When you type a word in the Windows search, it looks at an index of terms to find results faster. This is the only reason when you first run indexing; it takes a long to show you the results. However, once the indexing is completed, it will run in the background on your PC as you use it and will only re-index the updated data. However, the problem with search indexing is that it might slow down your PC if the index file gets corrupted. Although the feature is useful, it makes the device slower. If you have a low-end device, you might strongly feel the effect. So, if you are noticing that your PC is getting slower day by day, it’s best to disable the Search Indexing feature altogether.
3 Methods to Disable Search Indexing in Windows 11
So, in this article, we will share two best methods to disable search indexing in Windows 11 operating system. Let’s check out how to disable search indexing in Windows 11.
1) Disable through Windows Search Properties
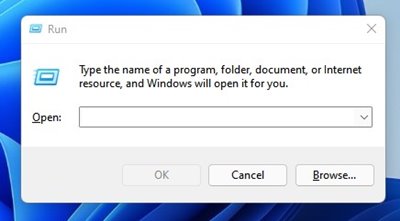
First of all, press Windows Key + R button to launch the Run dialog box.
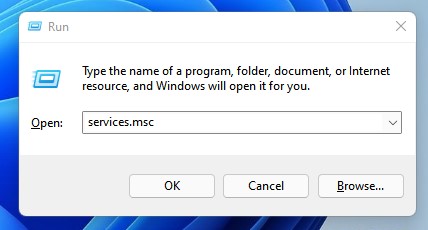
On the RUN dialog box, enter services.msc and hit the Enter button.
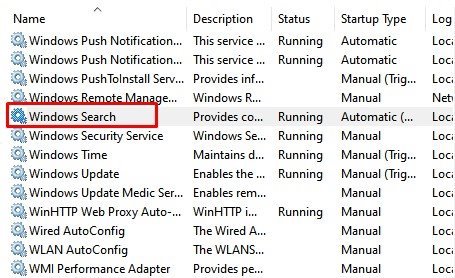
This will open the Windows Services page. On the right, scroll down and find the Windows Search services.
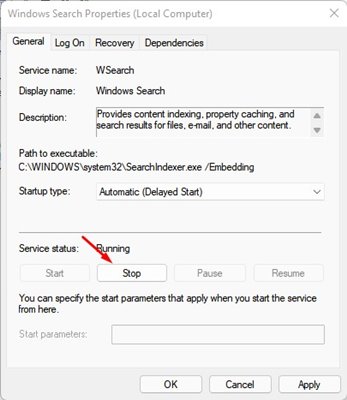
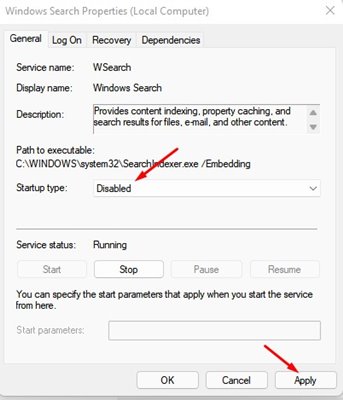
Double click on the Windows Search. Next, under the Services Status, click on the Stop button.
Now, under the Startup type, select Disabled and click on the Apply button.
That’s it! You are done. After making the changes, just restart your Windows 11 computer.
2) Disable Windows 11 Search Indexing via CMD
In this method, we will use the Command Prompt to disable the Windows 11 Search indexing. Here’s what you need to do.
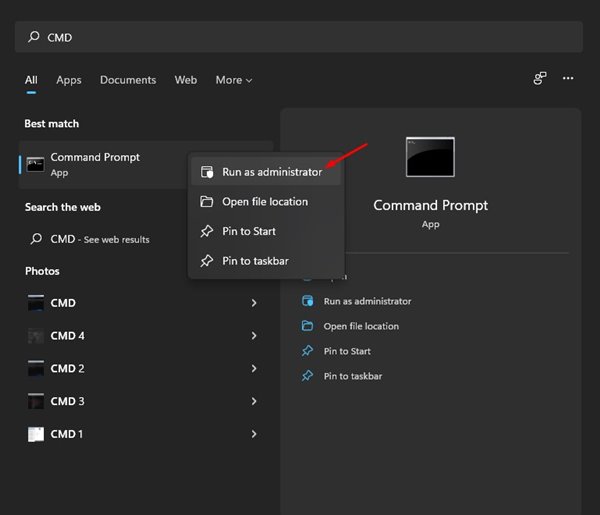
First of all, open Windows search and type in CMD. Right-click on the CMD and select Run as Administrator.
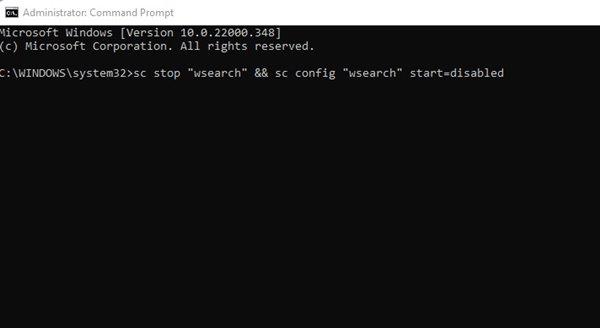
On the Command Prompt, you need to enter the command given below and hit the Enter button. sc stop “wsearch” && sc config “wsearch” start=disabled
Once done, restart your computer. This will stop and disable the Windows 11 search indexing feature.
3) Turn off Search Indexing for Specific Partition
In this method, we will disable the search indexing for a specific partition in Windows 11. Here are some of the simple steps to follow.
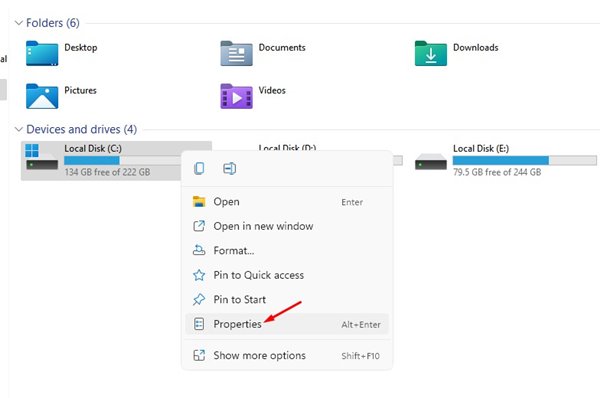
First of all, open File Explorer on your Windows 11.
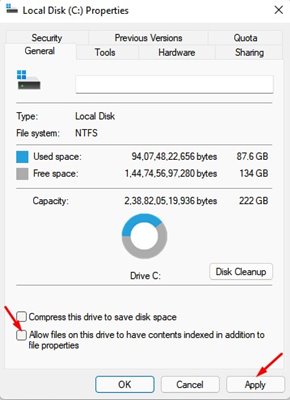
Now right click on the hard drive and select Properties.
At the bottom, uncheck the ‘Allow files on this drive to have contents indexed’ option and click on the ‘Apply‘ button.
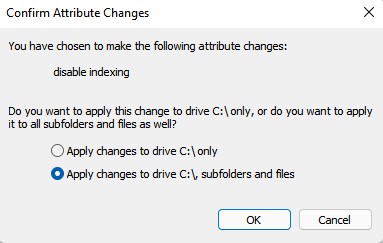
On the confirmation popup, select the second option and click on the ‘Ok‘ button.
That’s it! You are done. This will disable search indexing for a particular drive on Windows 11. Search indexing in Windows is a great feature. Unless you face any problem with it, you should leave the option enabled. To enable search indexing, you need to revert your changes. I hope this article helped you! Please share it with your friends also.
Δ