Thus you can also keep up the log for the files that have been printed, preventing the double printing of the files. If you want to view the print history, you must surf through some menus on your Mac, as you won’t get it available directly. In this article, you will learn how to enable the print history function on Mac and view the Print history afterward.
Steps to See Print History on MAC OS X
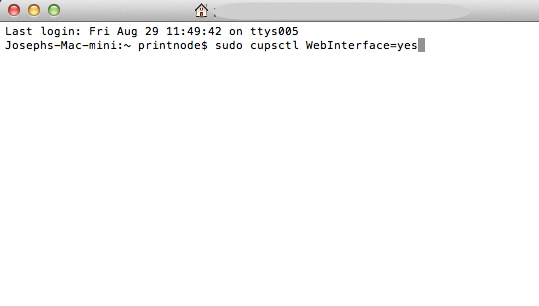
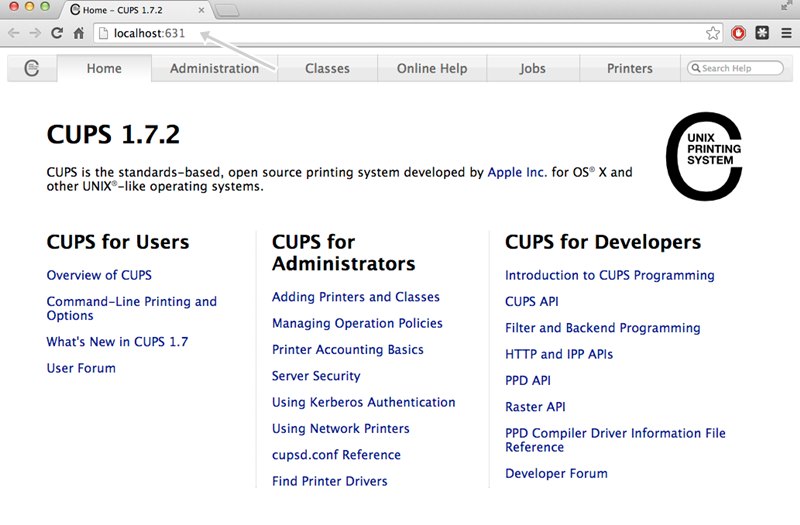
Here are some simple steps you must follow to view the Print history on your Mac. So follow these steps and proceed to get the history. This command will do nothing, and you won’t see any response from the Terminal app. You have to close the Terminal app. This process enables the web interface, and remember that it is very important to do this step before proceeding. 2. Open up the web browser on your Mac (say Google Chrome) and then type the address given below: There will be a tab “Jobs” on the page that follows the address you searched. Click on that tab, and you can now see your print jobs. 3. On the page following the above step, you can see the “Show completed Jobs” button or option. Click on that option to get a detail of all the Print History. So that was all you had to do. You will now get all the possible information regarding all the print actions you have made previously. So this was all about How to See Print History on Mac. This will help you greatly in managing the printing actions and prevent double printing of any document. Go through the steps above and know how to access the location to view the Print History.