If you have been using Windows 10 for a while, you might know that the operating system requires a password to Login for the sake of computer security. Every time your computer enters sleep mode, you are asked to enter the password. Although it’s a good security measure, the login screen becomes unnecessary if you only use the system. At times, this could be annoying as well. Fortunately, Microsoft allows Windows 10 users to skip the login screen in Windows 10. So if you choose to do so, you will no longer be required to enter the password whenever you attempt to Login. Also Read: How To Reset Your Forgotten Windows 10 Login Password
Skip Login Screen on Windows 10 PC (2 Methods)
In this article, we will share the best methods to skip the login screen in Windows 10 operating system. Let’s check out. Note: The login screen in Windows 10 is an important feature. You should never disable this security feature if your computer is shared with others. If you disable the login screen, anyone will be able to use your computer without going through any security steps.
1. Skip Login using User Account Settings
While logged into Windows 10, you need to make a few changes to the User Account settings of Windows 10 to skip the login screen. Follow some simple steps below to bypass a Windows login screen.
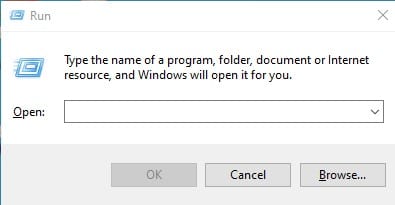
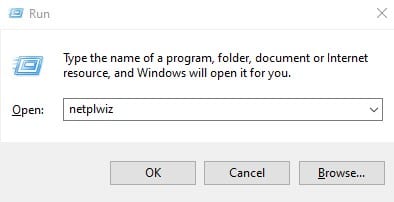
First, press Windows Key + R key on your computer to open the RUN dialog box.
On the RUN dialog box, enter ‘netplwiz‘ and hit the Enter button.
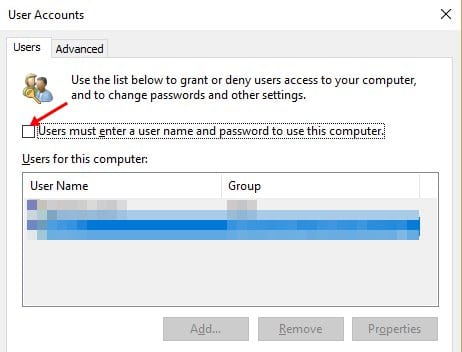
This will take you to the User Accounts page.
On the User Accounts page, uncheck the option ‘User must enter a username and password to use this computer’ and click the ‘Ok‘ button.
That’s it! You are done. Now you will no longer see the Windows 10 login screen.
2. Editing the Group Policy
In this method, we will make some changes to the Local Group Policy Editor to skip the login screen on Windows 10. First, follow some of the simple steps given below.
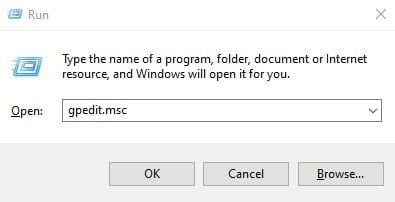
Firsl, press Windows Key + R on your computer to open the RUN dialog box.
On the RUN dialog box, enter ‘gpedit.msc’ and hit the Enter button.
This will open the Local Group Policy Editor.
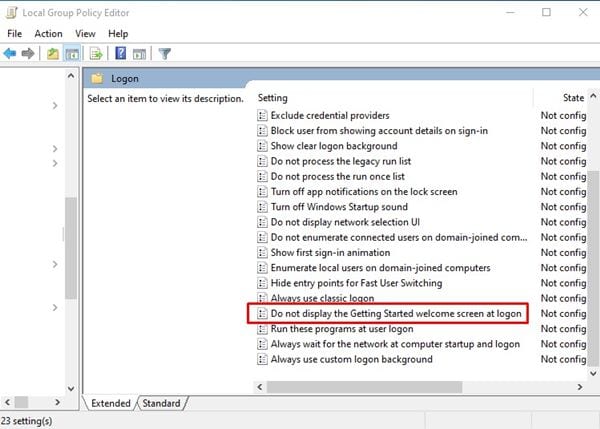
Head to Computer Configuration > Administrative Templates > System > Logon.
On the right pane, scroll down and double-click on the Don’t display the Getting Started welcome screen at the logon option.
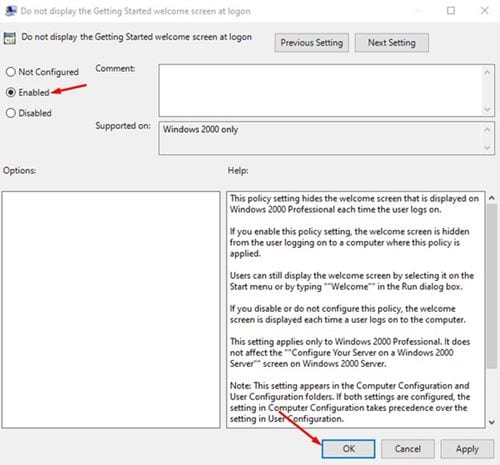
On the next page, select Enabled and click the Ok button.
Note: The two methods shared in the article might not work on the latest version of Windows 10. Also, if you are using the Preview builds of Windows 10, it may not work. This article is about how to skip the login screen in Windows 10 operating system. I hope this article helped you! Please share it with your friends also. If you have any doubts, let us know in the comment box below.